© Rachel Ricks 2008-2009

Tuesday, December 30, 2008

Impromptu Shoot...

Such a cute fam so I thought I'd share a few.

Photobucket

Photobucket

Photobucket

Photobucket

Photobucket

Photobucket

Photobucket

Comments, advice, and constructive criticism are appreciated as I am always trying to learn and improve. Thanks!

Sunday, December 28, 2008

Top 8 of 2008...

Here are my top 8 favorite photos of 2008:

Photobucket

Photobucket

Photobucket

Photobucket

Photobucket

Photobucket

Photobucket

Photobucket

Sunday, December 21, 2008

The Cutest Stocking Stuffer...

I had such a fun time taking pics of this cute little guy. He is just adorable.
I thought I'd make a slide show to share some of the photos. Hope you enjoy them!

Copyright Rachel Ricks, please, DO NOT COPY.


I'd love to know what you think and constructive criticism and advice always welcome.

Saturday, December 20, 2008

Holiday Photos...

Photobucket
With the business and craziness of the holiday it's difficult to remember all the moments we may want to capture during this time of year so here's a quick list of holiday photos you don't want to miss and a few tips on how to capture them.

Document traditions.
From baking Christmas cookies, to drinking hot cocoa, to decorating your Christmas Tree, make sure to document those traditions and celebrations that are meaningful to you this time of year. Don't forget to take close ups of the mug of cocoa or the decorated cookies. When taking close ups turn on the macro setting (the little flower.)
Photobucket

Santa hats are perfect props!
I take photos of my kids in Santa hats every year. We send out a photo Christmas card every year, so I printed the photos we've used for the past few years for our cards and plan to create a mini album to display every year during the holidays, adding a new photo each year. You could use them as ornaments or other decorations each year.
Photobucket

Take pictures of your favorite decorations.
We all have those special decorations, whether it was handed down from your granparents or it is the sweet ornaments your children made, take a picture and preserve them forever. The snowman belonged to my grandmother and is one of my most cherished decorations.
Photobucket

Photograph the gift-wrapping process, you could take pictures of your gifts piled up with your rolls of wrapping paper and ribbon to document this task.

Capture the glow of the Christmas tree or the candle-lit menorah.
Use your tripod (or place your camera on something steady) and turn off the flash, too! I've found when shooting indoors, with little light (mostly dark), setting my ISO to 400, shutter speed to 8, and aperture to 8 I get the pretty star glow from the Christmas lights. (If you're trying to take a photograph with your children and the tree make sure they stand very still or you will get a blurry mess.)
Photobucket

Everyone's together...get group photos.
Usually, for group shots you need to set your aperture around f/5.6 or f/8 so everyone is in focus. Take group shots at the begining of the day before everyone gets busy or tired out from all the fun and excitement, tired little ones make for difficult photo shoots.

Take photos that show the mood.
I love looking over at the tree with the presents set out underneath. Take the time to photograph this quiet moment before the gifts are opened and the chaos begins. Capture the excitement in your children or grandchildren's faces as they look over the presents. Take a picture of dinner and table settings/ decorations laid out on the table before everyone gathers to eat.

Remember to use a higher shutter speed during gift opening time, there will be lots of action in those photos.
With slower shutter speeds you will need more light so set your ISO higher as well.
When using camera flash have the subjects step a few feet away from the wall behind them to help cut out those harsh shadows flash can create and you should step back a few feet and zoom in so the light the flash creates doesn't white out the subjects.
Also, see if you can set your own white balance, it can really make a difference, especially indoors.

I hope everyone has a wonderful and blessed holiday!

12 Weeks To Better Photos...Week 2

So this week we practiced using shutter speed and ISO.

What is ISO?
ISO is a setting that determines how fast an image will be captured by the digital sensor. The higher the ISO, the quicker the image will be captured and the less light that is required. The lower the ISO, the longer it takes for the image to be captured and the more light you will need.
How do we know what ISO setting to use?
ISO depends mostly on the amount of light available. Remember back when we used film -- do you remember looking on the back of the film box for the handy reference guide that suggested what film speed should be used when? It’s still a good rule of thumb for digital cameras.

100-200 outdoors with bright light
400 outdoors in the shade or overcast/indoors with a lot of light
800-1600 indoors with low light condition/ sports and action

On to Shutter Speed...
After you’ve decided on which ISO setting to use, it’s time to set the shutter speed.
Shutter speed is how quickly the shutter, or the little door that opens in front of the image sensor, operates. It can range from several seconds (or minutes on some cameras) to 1/1600 of a second or faster. It helps to think of the shutter on the camera as an actual door, with the shutter speed controlling how fast or how slow the door opens and closes.
A faster shutter speed freezes action and a slower shutter speed creates a blurred effect when photographing movement. When setting your shutter speed on your camera, you’ll see numbers like 60, 120, 250, 1000 and so on. These actually represent 1/60th of a second, 1/120th of a second and so on. So the higher the bottom number on the fraction, the faster the shutter speed. The smaller the number, the slower the shutter speed. You will also see shutter speeds for seconds, indicated by inch marks ("). For example, if the display says 1"5, that indicates a shutter speed of 1½ seconds. If the display says 30", the shutter will be open for 30 seconds.

Tips:
Use your tripod (or a flat, stable surface) for shutter speeds slower than 1/50th
of a second -- so any shutter speed reading 50 or below, and anything with inch marks.

Use a slow shutter speed to portray a blurred subject or surroundings.

If you are hand-holding your camera, set your shutter speed at a
minimum of 1/60th of a second (indicated by the number 60) or faster.

Hold your breath while taking the photo to help keep yourself steady.

If you are wiggly or have wiggly subjects, increase your shutter speed.

Fast-moving objects will need a faster shutter speed, around 1/1000 of a second or higher, in order to freeze the subject in action.

Here's the challenge:

This is called the kitchen sink test. If you don’t have a window by your kitchen sink, try a bathroom sink. If you don’t have enough light inside your house, a water hose, a babbling brook, or a rain puddle will do.

First of all, set your camera to the Shutter Priority mode (often indicated with an "S" or "Tv" on your camera dial. Don’t worry about aperture as the camera will take care of that for you. If you are inside go ahead and bump up your ISO between 1000 and 1600 unless you have lots of natural light from a window.
If you need extra help figuring out your settings? These sites may help...Canon help...Nikon Help.)

Find something that will interrupt the flow of water, causing the water to splash around it ...similar to what a child’s boots do when tromping through a rain puddle... it could be a glass cup, vase, upside down bowl, anything that will allow the water to splash.
Set your shutter speed to 1/80th of a second (indicated by the number 80.) You can try lower if you would like. Turn on the water and take the picture.
Next, set your shutter really high (around 1/1000 of a second or higher) and take the photo again. (Remember lighting will get darker with higher shutter speed, sometimes I can't set my shutter speed this high indoors or the picture blacks out.)
Don’t worry if the two pictures aren't the same composition , we just want visual indication that the action has been "frozen" by using a high shutter speed.

Point & Shoot Tip:
Set your camera on action mode (usually a running man) to use a higher shutter speed. Take a photo in action mode and then again in a different mode, such as landscape, and compare the difference. For really slow shutter speed set your camera to night mode (usually a moon) and see what effect that gives you.

Here are my examples...
Since it has been dark and gloomy and rainy for over a week now I went with the jumping in the puddles suggestion.

My 3 yo was more than happy to help me out. It's not everyday mom asks if you want to go jumping in the puddles!

With it being so dark a.l.l. d.a.y. l.o.n.g it was difficult to have good light at my higheset shutter speed.

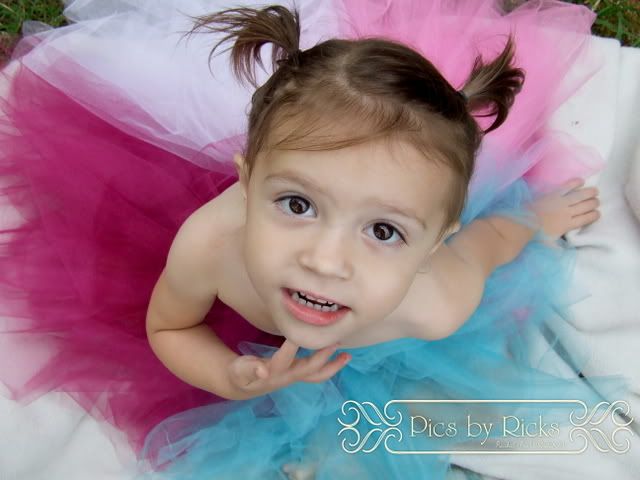
shutter speed 1/15, f/6.4, ISO 200
Photobucket
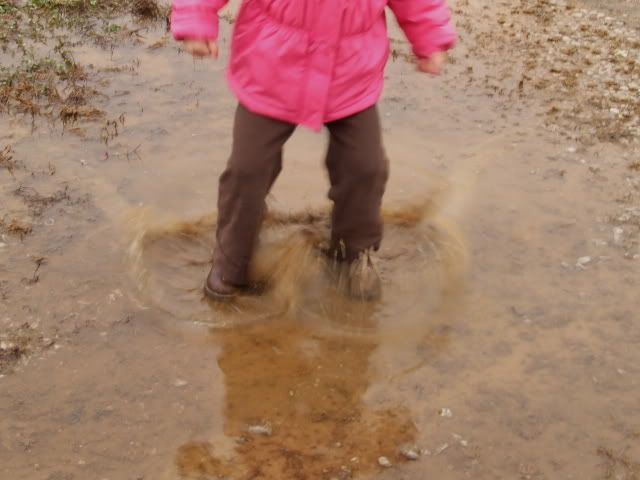
You can see the action is blurred. My daughter and the splashed water is not "frozen."

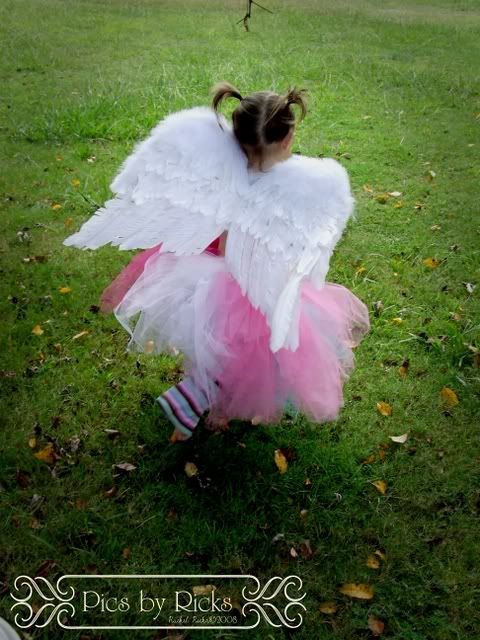
shutter speed 1/1000, f/3.5, ISO 400
Photobucket
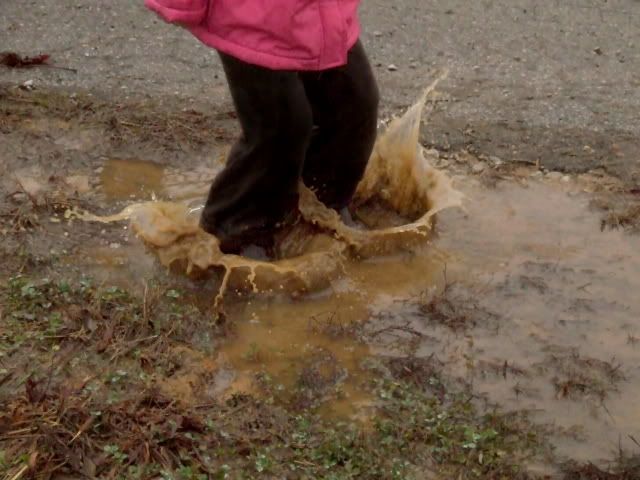
In this photo you can see the water "frozen" in mid splash. I love the droplets coming off of the big splash!

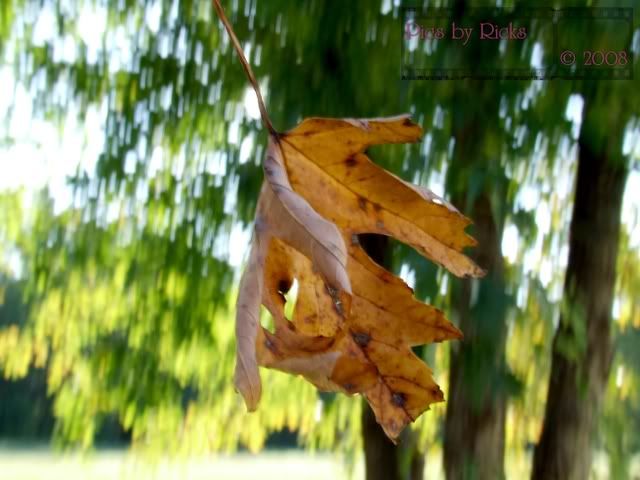
My sister and I decided to take the challenge further and also take a picture using the panning technique which has a lot to do with shutter speed and getting a blurred picture on purpose, lol, but I have run out of time and didn't get one, so I'll share an older picture using the panning technique.
Photobucket
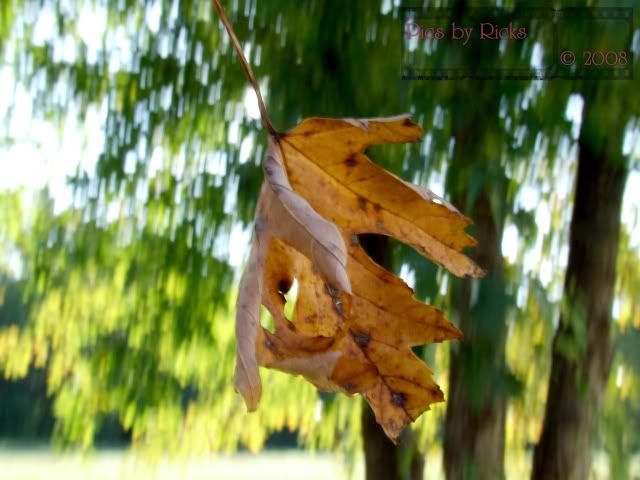
Notice the leaf is in focus but the background is blurred, showing the motion of the falling leaf.

Most of what I shared was from the Two Peas Class info, if you want to read even more of what they "taught" about ISO and shutter speed: click here.

If you are playing along with me let me know in my comments and include a link to your blog so we can all encourage and learn from each other!

Next we will be learning about light.

Happy Shooting...

Tuesday, December 9, 2008

12 Weeks To Better Photos...Week 1

My sister, Amy, and I decided to take a free online photography course by Two Peas in a Bucket called 12 Weeks To Better Photos. Feel free to follow along with the weekly challenges and learn more about your camera and how to take better pics.

Week 1...Aperture
Aperture, also called f/stop, determines how much of your photo will be in focus. In super simple terms, low number equals less focus...high number equals more focus.
If you are using a bridge camera or DSLR camera you will find a setting for aperture priority, usually marked with an Av or A on the dail. In this mode you choose your aperture setting and the camera sets the shutter speed.
The challenge- Set your camera to aperture priority mode and take 3 pics of the same thing with different aperture settings. The first picture at the lowest setting, the second at a mid range setting, and the third at the highest setting. Then load your pictures into your photo editing software and compare the difference.

A tip for those of you using a point and shoot camera and can't changes aperture settings- be sure to turn on the macro (usually a little flower) then take a few steps back and zoom in on your subject. It will blur the background more, creating the look of a lower aperture.

I have a bridge camera (but I am saving up for a DSLR!) so my aperture settings don't have as large a range as found on DSLR cameras, but you can still see the difference.

f/3.3 - notice the dead grass in the background is completely blurred...
Photobucket

f/5 - you can see that the grass is a little sharper but still not in focus...
Photobucket

f/8 - the grass in the background is now in focus...
Photobucket

When doing a head shot or when I'm photographing one subject I like to use a really low f/stop to keep your eyes focused on the main subject and blurring out anything in the background that may distract from the subject.

If you decide to follow along with these lessons include a link to your blog in my comments so I can check it out!

Next week's lesson: ISO & Shutter Speed.

Happy shooting! :)

Friday, December 5, 2008

I Got a Makeover!

Before...
Photobucket

and after I was bitten by the Twilight series, lol...
Photobucket

and another one with less orange lips!
Photobucket
I enjoyed playing around with my photo editing program!

Tuesday, December 2, 2008

Family Photo

We had a DIY family photoshoot using the timer on the camera.
Photobucket

Photobucket

What Do I Do With My Photos~Scrapbook, Of Course! My first love is scrapbooking. Take a peek...

Scrappy Side

A Little About Me & Photography

I have always enjoyed photography. As a young girl I remember driving my parents crazy always using the camera and begging them to pay extra for one hour processing. Thank goodness for digital. I love the instant gratification being able to see the photo instantly on the back of the camera. One day I made a cute little tutu and had my daughter model it for pictures. They were some of the best I had ever taken. As I looked over those photos I thought, "I want to learn more." Since then I have taken courses and joined photography groups for knowledge and support as I learn more about photography. Thank you to all of my friends and family who have patiently allowed me to practice on them. Thanks to my sister, Amy, who joins me in this learning journey. A big thank you to my sweet husband who supports and encourages me in all I do. There is so much satisfaction when I capture that perfect shot. I want to capture the everyday moments in a beautiful and creative way. I want to document the ordinary. Like the saying goes..."Enjoy the little things in life...for one day you'll look back and realize they were the big things." I hope to record the little things with my photography. Little moments captured forever. It's like time in a bottle.

My Copyright Notice

Please be aware I have worked very hard to create everything displayed on this site. Please do not use, copy, or print these photos without permission. Copyright © 2008, 2009 Rachel Ricks. Thanks!

Just Curious...